Showing posts with label Nuts. Show all posts

Wednesday, 20 September 2023

Bits and pieces & hints and tips

If you're using Sundae pots you want a size of 150ml approximately.

You might think it'll be fiddly filling them – I have a plan!

The neatest and least messy way of decanting the ice cream is to use a disposable piping bag – don't snip the end until it's full. Fold the edge of the bag back over your hand and spoon in the ice cream, when it's full then you can snip the end – it needs to be wide enough to allow the mixture to pass through the opening and then pipe into the Sundae pots!

Alternatively spoon into suitably sized containers with lids of say 4-6 scoops.

Here's a few photos that will help:


If you're interested, the origin of Rocky Road ice cream is said to have been created in March 1929 by William Dreyer … and his partner Joseph Edy with many variations along the way. After the Wall Street Crash of 1929 Dreyer and Edy gave the flavour its current name “to give folks something to smile about in the midst of the Great Depression”. Alternatively Fentons Creamery claims that William Dreyer based his recipe on a Rocky Road-style ice cream flavour invented by his friend, Fentons' George Farren.


Food for thought – there's a certain symmetry me thinks!


Rocky Road ice cream

Here's another idea for a no-churn recipe!


Vanilla ice cream


100g salted, toasted pecans, finely chopped

50g cocoa powder, sieved

50g mini marshmallows

1 x 397g tin sweetened condensed milk

1 x 600ml double cream

2tsp vanilla bean paste


8 x Sundae pots with lids

or suitably sized containers to split

the ice cream into say 4 – 6 scoops


It's a good idea to salt and toast the pecans the day before – they need to cool!

Heat a small knob of butter, gently, in a pan and when foaming tip in the pecans with a pinch of sea salt flakes. Stir over a medium heat for 3-4 minutes or until toasted – the delicious aroma will tell you when they are ready – don't leave them! Tip the nuts into a bowl and leave to cool.

On the day – empty the condensed milk into a large mixing bowl and gradually sieve in the cocoa – I use a tiny sieve, tapping the side with a spoon – you have more control - use a manual whisk to combine.

Then add the cream and vanilla bean paste and use an electric hand whisk until you get stiff peaks – i.e. stand on their own when lifting the mixing blades from the mixture.

Combine the pecans thoroughly.

Fold in the mini marshmallows gently so that they are covered in the ice cream.


Bits and pieces and hints and tips coming up!

Saturday, 8 April 2023

Another quick and easy bread recipe …

of the “no yeast” variety.

There's only one word for this loaf – scrumptious!


Cheese & Pecan loaf


60g Parmesan cheese, grated

350g plain flour

1 tbsp baking powder

pinch cayenne pepper

125g mature cheddar cheese, cut

into small cubes

60g chopped pecan nuts (or walnuts

if preferred)

4 spring onions, trimmed and chopped

250ml full fat milk

1 large egg

170ml tub of sour cream

salt and black pepper

900g (2lb) loaf tin, well buttered and

lined


Pre-heat your oven 180c/160fan/Gas 4

Sprinkle half the grated Parmesan cheese into the loaf tin to coat the base and sides.

Mix the flour, baking powder, cayenne pepper, 1 tsp salt and lots of black pepper into a large bowl. Mix in the cheddar cubes, nuts and spring onions.

In a separate bowl whisk the milk, egg and cream together then fold into the dry ingredients.

Spoon in the loaf tin, smooth the top and sprinkle with the remaining grated Parmesan cheese.

Bake for 50/55 minutes until golden brown – skewer test i.e. insert skewer into loaf, on removal should be clean. Cool in the tin for 5 minutes, turn out and transfer to a rack to cool.

Serve warm with lots of butter.

You could serve as part of a breakfast, a brunch, a snack or just because it's scrumptious!

Then there's a muffin loaf ...


Saturday, 9 July 2022

Editor's July Pick #5: Peanut Chocolate Brittle

Editor's note: I'm absolutely sure I've mentioned my passion for combining peanuts and chocolate before. It must be more than just me that's a fan because those Reece's things seem a tad popular! How about treating yourself to something that can be made at home in less time than it takes to walk out and buy some, but tastes far better?! This is one sweet treat that keeps on giving as I could quite happily eat it on its own for days but as MiamMiam says, can be combined with other desserts.


One down, eight to go ...


of the tabs that is! Here's the first recipe from The Little Book of Chocolat :


Peanut Chocolate Brittle


200g peanuts, unsalted*

200g granulated sugar

100g chocolate, in small even pieces


Heat your oven to 130fan/150c/Gas 2.

Place the peanuts on a baking tray and cook for 10 minutes until a light golden brown. Remove and set aside to cool.

Put the sugar in a heavy-based non-stick saucepan over a medium heat and shake** until all the sugar has melted evenly into a golden coloured caramel. Do not leave it as it burns very quickly. Add the peanuts and stir quickly with a wooden spoon. Pour on to a sheet of baking parchment, flatten and leave to cool.

When the brittle is completely cool, melt the chocolate in a bain-marie and spread over the top of the brittle. Leave to set. Or, if you prefer, melt a small amount of contrasting chocolate as well and then quickly drizzle both of them “Jackson Pollock-style” over the top and leave to set. Cut into small chunks using a sharp knife. This works well on its own or with ice cream.***


Hints, tips and notes


*I used salted peanuts. It's personal choice – the book mentions that you could try either.

**I used a non-stick frying pan. The sugar has a larger area in which to melt evenly – resist the urge to mess with it and do not prod! The process takes 10/15 minutes.

***I blitzed some of the brittle for a few seconds to give a large “crumb-like” consistency – you don't want dust – to sprinkle over your ice cream.

Fold the crumb-like brittle into home-made vanilla ice cream.

With apologies to our dentists!


Saturday, 11 June 2022

Speedier still sweets – Rubble!

Bearing in mind the success of Rocky Road, I'd forgotten about this recipe – it's fun, speedy and easy so here's another chocolate contribution.

I called it Rubble because I always get fragments of varying sizes that remind me of gravel and small stones. It sounds strange but bear with me, you'll see what I mean in the photo guide.

Here's the recipe :


Rubble


500g white chocolate

35g Rice Krispies

160g sultanas

140g pecans, roasted and

chopped coarsely

160g dried apricots

130g dried cranberries

105g pistachios, roasted and

chopped coarsely

1 tsp ground cinnamon


Melt the chocolate in a large bowl over simmering water ensuring the water does not touch the bowl. When the chocolate has melted fold in the remaining ingredients thoroughly so that the chocolate coats well and tip into a tray bake – size 32 x 9 cms approx. “Fridge” it for 2 hours.

If you want to add an extra level of flavour, before you begin, heat a small knob of unsalted butter (20g) in a frying pan, when it foams add the chopped pecans with a large pinch of sea salt flakes. Stir over a medium heat for 3-4 minutes or until toasted – you'll smell them when they are ready. Tip onto a baking sheet to cool.


Rubble – the plus points and the bonus


White chocolate is popular with the kids – it's not for the chocolate purists but, in this instance if you want to encourage the kids to eat fruit and nuts, it works.

I describe this treat as a sort of tutti frutti – by that I mean the Italian ice cream but using chocolate instead - not the bagged confectionery. Another useless piece of information – tutti-frutti means “all fruits”. Tutti-frutti has morphed into all sorts of different variations, depending which country you're in.

Another plus is only 40% of the treat is chocolate, the remaining 60% is fruit and nuts.

I would definitely recommend toasting the chopped pecans with the sea salt flakes, white chocolate is sweet and the slight saltiness of the toasted pecans helps balance that sweetness.

Cut into cubes, you'll get 96 pieces from your batch!


Rubble – step by step photo guide


a bowlful of glistening fruit and nuts


an important addition


ready to fridge!


using the photo above, with the long side of

the tray towards you, cut it in half and then into

six vertical pieces, set the other half aside. Trim the

uneven side and set aside.


turn three pieces lengthways and cut in half, then

in half again until you have 24 pieces – repeat with

the remaining 3 lengths – 48 pieces. Repeat with the set

aside half giving you 96 pieces in total.


here it is


The Rubble bonus up next


Now for the trimmed ends and the bits of Rubble and crumb.

Take a look :

the large and the small bits

You'll also get :

the fine crumb


Here's the thing – it doesn't matter what size the Rubble is there's a use for it. Choose your favourite size of Rubble and sprinkle it over ice cream with seasonal fresh fruit.

Are you thinking of serving a cheesecake anytime soon – sprinkle the larger pieces of crumb over the top.

If you're planning an ice cream treat of an old fashioned cornet - decorate with the fine sprinkles.

Are you making biscuits for the holidays – add the crumb to your mixture or use to decorate the tops.

Create a secret stash for yourself and freeze – preferably in different sizes but it's not the end of the world if you throw all of it into the same freezer bag.

Genius!


Saturday, 13 November 2021

Editor's Pick #3: Winter Menu - Treat of the Week!

Editor's note: It might not have escaped many but in the UK at the moment it's flipping cold! In-keeping with the recent brilliant weather, the next Editors pick is rather cheating as it's two recipes in one, but they go together so brilliantly they cannot be separated. Cream cheese and cashew nut paté and soda bread. Whack these out on a Sunday afternoon and you will be invited back again! Bit odd if you lived there in the first place but it's always nice to know you're still welcome.

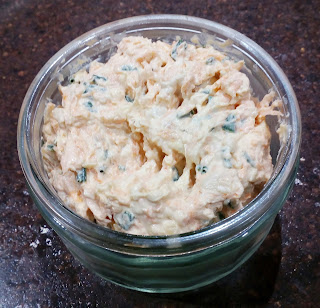
My treat of the week is a simple, veggie recipe and one of my favourites – cream cheese and cashew nut paté – it has to be the easiest paté ever – here it is :


Cream cheese and cashew nut paté


1 carrot, finely grated

225g cream cheese

100g roasted cashew nuts, crushed to a rubble – not

to a dust!

1 tbsp of chopped chives

salt and black pepper

black olives – pitted and sliced (optional)


Mix all the ingredients together, box and fridge.

Serve on whatever takes your fancy – rice cakes, gluten free cheese oatcakes, toast or even as a sandwich filling – a toasted bagel would be good too.


Freshly baked bread is the perfect partner to the paté so here's an extra treat for a “comfort” lunch – soda bread!

The following Soda bread is the easiest and fastest, faff free recipe and the most reliable I've ever used.


Soda bread


170g self raising wholemeal flour

170g plain flour

½ tsp salt

½ tsp bicarbonate of soda

290ml buttermilk


Pre heat your oven 180fan/200c/Gas 6.

Tip the flours, salt and bicarb into a large bowl and mix.

Make a well in the centre, pour in 290ml of buttermilk and mix quickly with a large fork until you have a soft dough formed. You may need an extra drop if your dough is too stiff but take care it should not be too wet or sticky.

Turn the dough onto a lightly floured surface and knead briefly.

Form the dough into a round a flatten slightly. Place on a lightly floured baking sheet.

Slice an “x” on the top of the loaf and bake for 30 minutes – the base should sound hollow when tapped.


I use St. Ivel low fat buttermilk which comes in 284ml pots. If the dough is a little dry, add a drop of milk – just a drop! You can always add a drop more if required – you can't take it back.

A tip – Instead of flour I sprinkle semolina on the baking sheet and sprinkle a little over the loaf before baking, for a crusty top.

If you're thinking of making soup, serve it with thick slices of toasted soda bread, buttered of course.


Saturday, 16 October 2021

Speed sweets … a Hodgepodge

aka a mess. I just love to be able to pull ingredients for a speed sweet straight from the store cupboard and freezer and serve a dessert worthy of the extra calories! Like I said a girl needs to be prepared - what follows is a series of recipe ideas and variations - the components of which can either be made ahead and frozen or can be part of your store cupboard.

Without further ado here's my most recent creation :


Hazelnut Hodgepodge


Serves 1


3 meringue kisses, crushed

1 scoop of vanilla ice cream

A sprinkle of toasted, chopped hazelnuts – 25g approx

30g frozen raspberries – defrosted – do not sweeten

1 tbsp sticky toffee sauce – loosen in microwave for

15 secs on medium


Assembly


A glass bowl or sundae dish makes this

dessert stand out, layer as follows :


crushed kisses

scoop of ice cream

sprinkle of hazelnuts

raspberries but reserve the juices

drizzle of sticky toffee sauce

drizzle of raspberry juices

Add a final sprinkle of hazelnuts


Do I have your attention?!


Saturday, 24 July 2021

A new ice cream … a summer treat!

This new ice cream combines my old favourite, the basic vanilla no-churn recipe, with an added surprise folded through.

The vanilla ice cream recipe is repeated for ease of reference, later on, but first comes the element that needs to be made ahead. Toasted, salted pecans, dipped in dark chocolate.

Toasted, salted pecans


75g unsalted butter

100g pecan halves, blitzed to a crumb

sea salt flakes

Heat a small knob of butter in a pan and when foaming, tip in the pecans with a pinch of sea salt flakes. Stir over a medium heat for 3-4 minutes or till toasted – you will smell them when they are ready. Tip the nuts into a bowl and leave to cool.

Here's a photo of blitzed toasted, salted pecans :


ready for the chocolate!

You'll need :

150g dark chocolate, minimum 50% cocoa solids

¼ tsp measuring spoon

a baking sheet lined with parchment

But first a quick reminder about melting chocolate.

You can melt your chocolate in a microwave – I prefer to create washing up by melting it in a large, squeaky clean glass bowl over a pan of gently simmering water. It's important that the simmering water does not touch the bottom of the bowl. It should be the steam from the water that melts the chocolate.

Resist the urge to prod and stir, leave it be. You can use a heatproof spatula when you can see that the chocolate is melting. Taking care to use oven gloves, lift the bowl onto a heat resistant non-slip mat – you may also find it useful to lay a tea towel on top of the mat so that you can dry the bowl – leave the chocolate to cool slightly.

Next up – dipping the chocolate and choices


Saturday, 25 July 2020

If all else fails … make a mess!

This series goes back to 2017 and if you want ideas for another variation on a theme, make a Hodgepodge - aka a mess.

Hazelnut Hodgepodge

Serves 1

3 meringue kisses, crushed
1 scoop of vanilla ice cream
A sprinkle of toasted, chopped hazelnuts – 25g approx
30g frozen raspberries – defrosted – do not sweeten
1 tbsp sticky toffee sauce – loosen in microwave for
15 secs on medium

Assembly

A glass bowl or sundae dish makes this
dessert stand out, layer as follows :

crushed kisses
scoop of ice cream
sprinkle of hazelnuts
raspberries but reserve the juices
drizzle of sticky toffee sauce
drizzle of raspberry juices
Add a final sprinkle of hazelnuts

sweetness – the meringues
texture – the hazelnuts
sharpness – the raspberries and the juices
sticky toffee sauce and ice cream – pure indulgence

what is a dessert without indulgence!

A Hodgepodge is instant – ish. You can put in as much or as little effort as your time permits – to explain.

You can buy drums of meringue kisses or make your own*.
You can buy ice cream or make your own*.
You can buy whole hazelnuts and chop and roast or buy roasted, chopped hazelnuts in 100g bags ready to use.
Raspberries are available – preferably fresh, frozen if not.
You can buy jars of caramel sauce – dulce de leche or salted caramel or you can make your own sticky toffee sauce*.

We've covered all the recipes marked * in the Dids “Susan” ideas.

If you like the simplicity of the Hodgepodge there are two more recipes – Hodgepodge – Take 2 3rdApril 2017 (Cherry and Chocolate) and Hodgepodge again - 18thApril 2017 (Lemon & Blueberry)

Whichever dive in dessert you choose to serve have the best time ever with your loved ones and stay safe and well.


Thursday, 19 September 2019

Cranks …


...it's such a lovely word. I know that these days it means different things but back in the day a crank was “a person who has strange or unusual ideas and beliefs”. I don't know for certain whether that's how Cranks vegetarian restaurant got its name but a vegetarian in the 1970s was definitely seen to be strange – brilliant!

Cranks vegetarian restaurant opened its doors in 1961 and David Canter was the person we have to thank. Sadly David Canter died in 1981 and Kay Canter and Daphne Swann sold Cranks to Guinness in 1987. Since that time it has been bought and sold many times. My first experience of Cranks was in their Covent Garden establishment – it was revolutionary in its day and the food was delicious.

One of my most treasured cookery books is one of theirs. It's old and frail now but still used. I can do no better than to give you a recipe from The Cranks Recipe Book Cranks Restaurants.

Cream cheese and cashew nut paté

1 carrot, finely grated
225g cream cheese
100g roasted cashew nuts, crushed to a rubble – not
to a dust!
1 tbsp of chopped chives
salt and black pepper
black olives – pitted and sliced (optional)

Mix all the ingredients together, box and fridge. If you are feeling really virtuous have a side of raw carrot!

Serve on whatever takes your fancy – rice cakes, gluten free cheese oatcakes, toast or even as a sandwich filling – a toasted bagel would be good.

My cookery book recommendation for your Christmas List is one of Cranks – they are still available on Amazon – of course you don't have to wait until then – you could always treat yourself now!

Sunday, 30 December 2018

Stuffing or a nut roast … the photos


Before and after ...


Spread mayo on one slice of bread and
redcurrant jelly on another, add slices of mature
cheddar cheese then crown with the stuffing – yum!

I used Merchant Gourmet Whole Chestnuts 180g and ready to use.


Slice the remaining 100g of chestnuts, add diced smoked bacon or chorizo and finely sliced raw sprouts, season with salt and black pepper – stir fry the lot in a drop of rapeseed oil and a knob of unsalted butter – delicious!


New Year bits and bats – my choices …


a stuffing or a nut roast!

Long before I realised I didn't like meat the one meal I always looked forward to was a Sunday roast – strange I know. I loved Yorkshire Puddings but my absolute favourite was stuffing. Over the years I've developed my own which can be a straight forward stuffing, a nut roast or – my personal favourite - the ultimate sandwich filling.

A stuffing or a nut roast

170g/6oz breadcrumbs
Generous sprinkle of dried sage
80g/3oz chopped chestnuts
40g/1½oz unsalted butter
1 medium onion, finely chopped
200ml/7 fl oz boiling water
200g/7oz puréed apples

You can make stuffing balls or bake it in a loaf tin using a cake liner. It's entirely a matter of choice – I prefer the loaf tin/liner method and then slicing. The loaf tin measures 25x14x6.5cms, that's 10x5½x2½”.

Pre-heat oven 200fan/220c/Gas 7.

Bake for 25/30 minutes.

It freezes well too!

Photos up next.


Thursday, 13 December 2018

Praline sprinkle photos


doesn't look much


hang in there – it's on its way


told you so


 looking good


leave it 'snapped' if you prefer


tiny bits of twinkling toffee


Thursday, 20 September 2018

The paté report


I promised I'd report back after “A rant and a mushroom paté”.

It was class this week and I made the paté so my friend got to taste it – fingers crossed. I'm delighted to report, “it's as good as the one they've stopped making … hits the mark for sure!”.

Before we finish with paté I decided I'd include another favourite – it's another veggie recipe but even the meat eaters enjoy this despite the initial raised eyebrows. It's a great combination of flavour and texture and the fastest paté you'll ever make.

Cream cheese and cashew nut paté

1 carrot, finely grated
225g/8oz cream cheese
110g/4oz roasted cashew nuts, crushed to a rubble
not a dust!
1 tbsp of chopped chives
salt and black pepper

black olives – pitted and sliced – optional

Mix all the ingredients together, box and fridge, leave for 2 hours to firm.

Spread on whatever takes your fancy – rice cakes, gluten free cheese oatcakes, toast or even as a sandwich filling – finally my personal favourite, a toasted bagel.


I served tasters of both the patés with soda bread and they took goodie bags home too!

My work here is done.


Sunday, 10 September 2017

Back to the new book ... the spread … the verdict

If you ever want an honest opinion ask a young person!

Here's JJ with her breakfast toast :


... actions speak louder than words.

Here's the spread in the processor :


and finished in its jars.


Guess who wants to take it home?

P.s. Try the spread on toasted crumpets for lunch – another thumbs up!


Back to the new book ... now it's three down, six to go!

Since it's the summer holidays Grandaughter JJ is visiting for a few days. Among other treats we always try and spend some time in the kitchen.

What better way to begin this year than with another experiment from “The Little Book of Chocolat” - I'd earmarked this particular recipe because I thought it would appeal to JJ – in addition to which she could take it home for her brothers and sister too for them to sample.

So, I give you chocolate spread. Underwhelmed – can't say it would be top my list either but if you have Grandchildren of a certain age then I think you'll be a very popular person!

Before we go on – a strong word of warning – ANYONE WITH A NUT ALLERGY STEER CLEAR!

Chocolate and Hazelnut Spread

Takes 1 hour – makes 2 x 250g jars

150 hazelnuts, toasted and peeled
75g icing sugar
250g dark or milk chocolate, broken
into small, even pieces
25g butter
100ml double cream
pinch of salt

Place the hazelnuts in a food processor and whizz until smooth. Add the icing sugar and blend. Warm the chocolate, butter and cream in a bain-marie until smooth and melted, add to the whizzed nuts and icing sugar in the food processor along with a pinch of salt and blend until smooth.

Sterilize the jars – I put mine in the dishwasher – alternatively you can place two clean glass jars together with their lids on a baking sheet and put them in the oven at 120fan/140c/Gas 1 for 20 minutes.

Transfer the chocolate spread to the jars and leave to cool and set. It is best used at room temperature to ease spreading but needs to be stored in the fridge.

This is looking promising!