Showing posts with label Onions. Show all posts

Saturday, 20 August 2022

More Rocket Science … and thrift!

Remember in Rocket Science and Light Bulbs! I suggested baking potatoes and grating cheese – here's where both come into their own for a weekend treat. If you can't run to Gruyere cheese and ham hock you can use Mature Cheddar and bacon bits instead - it will still be scrumdiddlyumptious!

I'm sure you've heard of a Croque Monsieur – it's a baked, or more popularly, fried sandwich which forms a crispy crust but an oozing filling in the middle. Croque literally means “crunch” from the verb “croquer” - “to bite”. This is a “toastie” done right. No need for a big piece of kit that gets used once a year and takes up cupboard space - oh no!

There are heaps of different variations of the croque. My most recent gives you a short cut too if you're pressed for time. I assembled the sandwiches in the morning, ready to be completed in the evening.

Croque with hock


for 4 sandwiches


8 slices of medium wholemeal bread

4 tsps Dijon mustard

75g each of Gruyere and mature cheddar cheese, grated

1x90g pouch of cooked ham hock

1 medium onion, preferably sweet or mild flavour,

finely sliced and left raw

60g unsalted butter


Spread ½ tsp of mustard over each slice of bread. Spread the cheese onto 4 slices of bread followed by the onions and ham hock. Sandwich together with the other 4 slices of bread.


At this stage place your stack of croques on a large sheet of foil, wrap tightly and fridge.


When you're ready to roll! Heat half the butter gently in a frying pan until foaming – you'll get two sandwiches in your frying pan – fry for 1-2 minutes on each side and then pop the croques onto a baking sheet and into the oven whilst you repeat using the remaining butter and two sandwiches.


You may think the onion would be harsh to the palate but I assure you it isn't, provided you use either a sweet or mild variety. The sharpness of the onion cuts through the richness of the cheese.

I should say too that I divided the 90g of ham hock between three of the croques, the fourth without the hock is for me – wrapped separately. It's no hassle to serve with or without!

Alternatively if your household is split and some like onion, some don't - here's an option - leave it out and serve :


Balsamic Onion Jam


I love Balsamic Vinegar and so the following recipe ticked all the boxes. It's great too for anything cheese or ham related for that matter like a Ploughman's Lunch or a cheese & “jam” doorstep sandwich with fresh bread, much better than Branston Pickle in my humble opinion.

Here it is :


Balsamic Onion Jam


4 medium brown onions, finely diced

4 tbsp balsamic vinegar

4 tbsp soft dark brown sugar

1 garlic clove, finely chopped (optional)

1 tbsp unsalted butter – 15g-30g


as a guide my “tablespoon” was exactly that -

from the cutlery drawer


the large frying pan measures 29cms/11” in diameter

and is non-stick


Using a large frying pan, cook the onions in the butter over a medium/high heat, stirring constantly for 5-8 minutes until they are opaque. Add the vinegar and sugar. Reduce the heat to low and simmer gently until the onions are cooked down to a jam-like consistency for 20-25 minutes. Do not cover the pan at any stage.

The recipe will give you 300g of jam.

Cool and place in a sealed container or a jar with a tightly fitting lid and keep in the fridge.


Balsamic Onion Jam – the photo guide


the onions, finely diced

cooked in the butter for 5-8 minutes

until they are opaque


simmered gently – for the first 10 minutes

you can see there's liquid at the edges


simmered for the final 10 minutes now

the liquid has disappeared and the consistency

is jam-like and darker in colour


here it is – in all its glory!


Then there's a relish option … I like a relish that's finely cut, not large pieces that are difficult to “sit” on top of a biscuit with cheese or on top of a generous slice of good bread and butter, cheese and topped!


Bazzin' beetroot relish


300g vac pack of organic cooked beetroot

drained and cut into small cubes

1 sharp eating apple, peeled, cored and cut

into small cubes

1 medium onion, finely chopped

75g soft dark brown sugar

1 tbsp balsamic vinegar

1 tbsp olive oil

salt and black pepper


Don't forget to use gloves when prepping your beetroot!

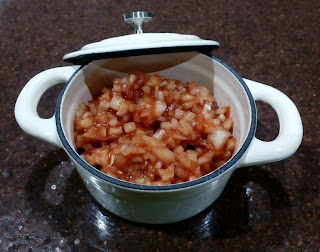
Mix well and place all the ingredients in a medium saucepan – 16cms in diameter. Simmer on a low heat, uncovered, for 30 minutes, stirring occasionally until all the liquid has been absorbed.

Take the pan off the heat and allow to cool. Box up and fridge until ready to use.


Finally the wedges


Using the cooked baked spuds from your stash cut your wedges into similar sizes and place on a large baking tray, drizzle with rapeseed oil and pop into a pre-heated oven 180fan/200c/Gas 6 – 15 minutes then shake and repeat. The more wedges you have the longer it will take for them to be crispy and brown. Tip into a bowl and sprinkle with a seasoning of your choice – Chinese 5 Spice, Chilli Flakes, or Classic Paprika & Onion, to name but three. Shake again and serve.

All you need to do is synchronise – place the wedges in the oven for the first 15 minutes and then finish off the croques during the remaining 15 minutes.


Yum!


Saturday, 13 August 2022

Rocket Science and Light Bulbs - Part 3: Next on the thrift list

Here's a dish using your baked jackets spuds. This is originally a side dish but has morphed into a stand-alone veggie meal by adding a selection of other stuff – cauliflower and chick peas to name but two!


Bombay Aloo – aka Bombay Potatoes


2 large jacket spuds from your stash, peeled if you prefer

OR

500g of cooked potatoes – I use Charlottes – whatever you use it should be a waxy potato that holds its shape, so any new potato will be just the job


1 medium onion, finely diced

1 tbsp rapeseed oil

250g passata

1 tbsp tomato paste

1 tsp caster sugar

1 tsp ginger paste or 1” fresh, grated.

2 cloves of roasted garlic or 2 cloves of fresh, crushed

1 tsp each of ground cumin, coriander, garam masala and curry powder. Use a curry powder that best suits your palate and how much heat you like – mild, medium or hot

1 tsp salt or to taste


Use a medium size saucepan (21cms/8”).

Your potatoes should be cut to approximately 6-12 cms/¼” to ½” pieces.

Fry the onions in the oil until soft – 3-4 minutes. Add the ginger, garlic, spices and salt. Fry so that the spices are released. Add the potatoes and the tomato paste, fry gently so that the potatoes absorb the flavours and the paste cooks too – 3-4 minutes.

Add the passata and sugar and cook on a gentle heat for 10 minutes**. Taste the Bombay Aloo, adjust salt and sugar to personal taste. Cool, box and fridge. The longer you leave this dish the better it will be. It freezes well.


As a guide this recipe will give you 690g of scrumptious Bombay Aloo.

You can add a can of chick peas, drained and rinsed or tiny florets of cauliflower with the passata and sugar marked ** above - or anything that takes your fancy!

Here's a photo guide of the original Bombay Aloo :


the beginning


the middle


the end


in an individual pot, ready to roll!


It's a win win – you use up any potatoes and produce a dish that will go down a storm – an added bonus - if you cook it on purpose it doesn't break the bank – I love it when an economical plan comes together especially when it tastes so good!

P.s. Have you ever wondered how they make the “onion salad” served with the poppadoms? I know that it varies from restaurant to restaurant but, many moons ago I was given a recipe which, to this day I've never committed to paper.

Here goes :


2 medium onions, finely chopped -

weight 150g per onion approximately

salt and black pepper

2 tbsp fresh orange juice

1 tbsp lemon juice

1 tbsp tomato paste

pinch of chill powder


Place the onions in a large mixing bowl. Add the remaining ingredients and mix well.

Place the salad in sealed airtight containers and store in a cool place.


The secret to this salad is that you should not serve it for at least a day, preferably two after making it. It's important that the orange and lemon juice and the tomato paste are allowed to “mature” - leaving it to infuse takes away any harshness from the onion and the tomato paste.

This is a perfect accompaniment for any curry.

Here it is :

If you are a lover of all things spicy then this onion salad is excellent with cold meats or, best of all, with a strong mature cheddar cheese.

Enjoy!


Saturday, 15 January 2022

Editor's January Pick #10: Onion Salad Side

Editor's note: This recipe is a sure fire winner. Also, I feel like I've been taken to one side and been told a trade secret when it winds up tasting just as good as the stuff they serve you in a restaurant. Annoyingly enough they usually take it away when they bring your main – surely it's to be eaten “across the board”, so why take it away?!

It's so moreish – provided of course you like onions!


Have you ever wondered how they make the “onion salad” served with the poppadoms? I know that it varies from restaurant to restaurant but, many moons ago I was given a recipe which, to this day I've never committed to paper. It has to be said that it's quite hot and obviously you have to like onion.

Here goes :


2 medium onions, finely chopped -

weight 150g per onion approximately

salt and black pepper

2 tbsp fresh orange juice

1 tbsp lemon juice

1 tbsp tomato paste

pinch of chill powder


Place the onions in a large mixing bowl. Add the remaining ingredients and mix well.

Place the salad in sealed airtight containers and store in a cool place.

The secret to this salad is that you should not serve it for at least a day, preferably two after making it. It's important that the orange and lemon juice and the tomato paste are allowed to “mature” - leaving it to infuse takes away any harshness from the onion and the tomato paste.

This is a perfect accompaniment for the koftas but is equally as good with any curry.

Here it is :


If you are a lover of all things spicy then this onion salad is excellent with cold meats or, best of all, with a strong mature cheddar cheese.


Saturday, 19 June 2021

More “sides” ideas ...

Are you a fan of the selection of relishes served with your poppadoms in your favourite Indian Restaurant? Many moons ago I was given a recipe for the onion relish. It has to be said that it's quite punchy and obviously you have to like onion – if you do it definitely hits the spot!

Here it is :

Onion Relish


2 medium onions, finely chopped -

weight 150g per onion approximately

salt and black pepper

2 tbsp fresh orange juice

1 tbsp lemon juice

1 tbsp tomato paste

pinch of chill powder


Place the onions in a large mixing bowl. Add the remaining ingredients and mix well.

Place the relish in sealed airtight containers and store in a cool place.

The secret to this relish is that you should not serve it for at least a day, preferably two, after making it. It's important that the orange and lemon juice and the tomato paste are allowed to “mature” - leaving it to infuse takes away any harshness from the onion and the tomato paste.

The combination of the Bombay Aloo and the Onion Relish balances so well with sweet mango chutney and refreshing raita … speaking of raita

P.s. Not connected at all to the New Year in July bash, if you are a lover of all things spicy then this onion relish is excellent with cold meats or, best of all, with a strong mature cheddar cheese.


Saturday, 13 March 2021

Finely diced onions – the easy way!

The best way of describing this technique is with a photo-guide, here goes :

all that's required is a small chopping board and

a sharp paring knife - peel a medium onion as shown

below


cut the onion half and

lay it flat on your chopping board – take a

close look at the onion and you'll see natural lines


take your paring knife and follow the lines in

the onion – slicing through leaving

the root alone, stopping short by 1.5cms/½”

approximately so that the onions stays

in tact


assuming you're right handed, hold the

onion with the root to your left and slice across the

onion finely with your paring knife, carefully,

keeping your fingers slightly tucked away


take it slowly and if this is your first attempt

I'd suggest you stop well short of the root as shown

then repeat with the remaining half - ta dah!


I've always diced onions using this method and was taught that the root is the cause of “tears”. I can honestly say that I've never had an issue.


Back to the remaining pie filling ideas ...


Balsamic Onion Jam – the photo guide


the onions, finely diced

cooked in the butter for 5-8 minutes

until they are opaque


simmered gently – for the first 10 minutes

you can see there's liquid at the edges


simmered for the final 10 minutes now

the liquid has disappeared and the consistency

is jam-like and darker in colour


here it is – in all its glory!

I like a relish that's finely cut, not large pieces that are difficult to “sit” on top of a biscuit with cheese or on top of a generous slice of good bread and butter, cheese and topped!

You could even add a tablespoon to soups or casseroles for extra flavour.

Speaking of finely diced and whilst we're on the subject … next up is a class on how to finely dice onions ...

Saturday, 6 March 2021

Balsamic Onion Jam

I had planned a treat for supper – a Croque Monsieur with a side of fries and wanted a savoury “jam” or relish to serve with it. I love Balsamic Vinegar and so the following recipe ticked all the boxes. It's great too for anything cheese related for that matter like a Ploughman's Lunch or a cheese & pickle doorstep sandwich with fresh bread.

Here it is :

Balsamic Onion Jam - 4 of everything!


4 medium brown onions, finely diced

4 tbsp balsamic vinegar

4 tbsp soft dark brown sugar

1 garlic clove, finely chopped (optional)

1 tbsp unsalted butter – 15g-30g


as a guide my “tablespoon” was exactly that -

from the cutlery drawer


the large frying pan measures 29cms/11” in diameter

and is non-stick


Using a large frying pan, cook the onions in the butter over a medium/high heat, stirring constantly for 5-8 minutes until they are opaque. Add the vinegar and sugar. Reduce the heat to low and simmer gently until the onions are cooked down to a jam-like consistency for 20-25 minutes. Do not cover the pan at any stage.

The recipe will give you 300g of jam.

Cool and place in a sealed container or a jar with a tightly fitting lid and keep in the fridge.

Photo guide coming up …