Sunday, 21 May 2017

The Inquest and the day after.

The Operating Instructions and The Manual provided both state the capacity of each melting pot is a maximum of 250g of chocolate (or candy buttons) and states “Note: If using block chocolate, chop or grate the chocolate into small pieces to reduce the melting time … and … Do not melt chocolate or candy buttons to a level above the “MAX” line stamped in the melting pot.”

The jury's out.

I used small chocolate chips and weighed out 250g – if I'd have used them all they would have overspilled the pot so I reduced the weight to 200g.

I couldn't find any instructions or information anywhere in either the Operating Instructions or the Manual how long it takes to melt, in theory, 250g of chocolate.

It's no wonder customers get frustrated – don't they understand – it's not rocket science!

Moving on, use your ever faithful kitchen timer. Set it for 10 minutes for the pre-heating process. Add your chocolate, set your timer again for 10 minutes – it doesn't look particularly encouraging at the end of the first 10 minutes period, stir the chocolate as it suggests, set the timer again for another 10 minutes. Now it's looking much better – nice and glossy.

So, the answer to my original question is preheat for 10 minutes and it takes 20 minutes (in two 10 minute blocks) to melt the chocolate.

The other question that occurred is – what if I've got chocolate leftover in the melting pot – can I re-use it?

I had leftover chocolate which I set aside and covered. The following day I uncovered the melting pot and chocolate, placed it in the base and preheated for 10 minutes on the melt position II. After preheating I set my timer for a further 10 minutes and can confirm that the chocolate melts perfectly and is ready for use. You may need another 2 minutes or so, depending on the type of chocolate you are using. Total time – 22 minutes.

I then made another batch of chocolate discs as good as the previous day.

The 200g of chocolate will give you 25 chocolate discs – you may get more or less depending on the thickness of chocolate disc you prefer.

In conclusion not a bad piece of kit for the money – poor instructions but I'm glad I invested.

After all that hard work I think I need to retire for a rest – with chocolate of course!

Not a bad effort!

As soon as you've completed your circles release (as I know I'm fond of saying) your inner Jackson Pollock and scatter your fruit and nuts where you may – it doesn't matter at all if they spill – they'll land on the tray.

Here they are :


Now for the difficult bit – resist the urge to prod and place the baking sheet in a cool dry place for 2 – 3 hours – NOT in a fridge. The chocolate discs will lift easily from the parchment :


If there are any left – of course you need to sample – place in a box with a tightly fitting lid and keep in a cool, dark place – NOT the fridge. They'll keep a week – tee hee.

A really useful sweet morsel – I hope you'll agree.


Here goes nothing!

The instructions are straight forward and the base unit easy to understand. You preheat the base unit with a melting pot inside for 10 minutes, then add the chocolate, stirring occasionally until melted :


Remove the melting pot from the base and pour a small blob of melted chocolate onto each circle on the parchment :


Using the back of a spoon – I used a dessert spoon – in a circular motion gently ease the melted chocolate out to fill the circle :


Do not panic if you overrun the circle – it's not the end of the world – practice makes perfect, it's like using a piping bag for the first time – give yourself a break.

The end product!

It's always a good idea to decide on an end product when road testing kit and my advice would definitely be don't choose anything too complicated – it will only end in tears with you covered head to toe in chocolate – a slight exaggeration may be! It should be a fun exercise with something to show for it.

I thought I'd have a shot at what we used to call “petit fours” they could be used with a dessert or, as they were originally served, a sweet hit with an after dinner coffee and/or liqueur – very 1970s. You know you've always wanted to produce your own version of an After Eight Mint!

So, have a look in your store cupboard/pantry and grab a handful of whatever takes your fancy – in the fruit and nut line that is … I chose my usual favourites because they are staples in my pantry – tart cherries, apricots and pistachios. Chop them, finely – you can mix them if you wish or leave them in individual heaps, ready to scatter later.

A final tip – don't experiment with new pieces of kit, or recipes for that matter, if you haven't got the time – if you put yourself under pressure you'll rush and chances are you won't be happy with the result.

My new piece of kit.

Those of you who follow the blog regularly will know that I'm not one for spending dosh on kit for it to gather dust. With that in mind I thought I'd treat myself to a chocolate melting machine.

I melt chocolate frequently and I'm an old fashioned kinda gal and always use the steam method – saucepan with the bowl on top – never a microwave, personally I don't think you can control the chocolate and microwaves vary. The only downside to the old fashioned method is that it creates washing up. When I saw the Chocolate Melting Pot in Lakeland, I thought it looked neat and, reasonably priced at £19.99, it wouldn't break the bank.

Here it is :


Never let it be said that I don't have your best interests at heart - for the purpose of its inaugural outing I'm keeping it simple.

The plan :

You'll need :

a baking sheet measuring 30x30 cms

a piece of baking parchment measuring 29x29 cms
- slightly narrower than your baking sheet

4 large paper clips

the chocolate melting pot base and one melting pot

Before you begin

Secure your parchment to the baking sheet with the four paperclips

Draw circles on the parchment measuring approximately
6 cms in diameter – I used a straight sided pastry cutter – anything
circular will do

As a guide you'll get approximately 9 circles on the parchment.
Leave space between each circle.

When you've drawn your circles turn the parchment over
so that the pencil side is face down, then secure again with
the paperclips


Off we jolly well go!


Sides and asides!

Sides

You don't have to serve the fishcakes with the slaw.

Asparagus is in season and would make an excellent companion. If you wanted to serve a mixture of veggies – how about a stir fry – you can buy punnets of small sweet peppers - orange, yellow and red. De-seed and slice the peppers – blanch and refresh your asparagus and stir fry for 2/3 minutes in a drop of rapeseed oil, add salt and black pepper and a pinch of sumac would work really well. Use anything that you like – a sliced sweet onion, courgettes.

Samphire is just coming into season. For those who are wondering, samphire is classed as a sea vegetable – I think of it as a type of seaweed. It's salty if you use it raw. It needs to be either boiled or steamed for a minute or two.

Try it mixed with baby asparagus – steam them both together for a couple of minutes and serve with the fishcakes and a sauce.

Two notes :

Don't forget to snap your asparagus – any woody inedible ends will snap naturally – discard them or, if feeling virtuous you can turn them into soup.

To save your aching feet – samphire is usually found on the fish counter.

Asides

Here's what the girls said about the class :

The most amazing Coronation Slaw and Fishcakes. Pudding delicious!”

The mushrooms were so flavoursome and would make a fantastic dinner party starter.”

A totally wonderful meal. Mushrooms so tasty, fishcakes and coleslaw a delight, sweet – unusual mixture and terrific.”

Wonderful food and ideas!”

The recipes for both the Champignon au tartines and the Hazelnut Hodgepodge are posted on the blog.

Went down well I thought!


A fishcake post script

Here's my variation on The Ivy's fishcake recipe.

Stuff it!

In this case with a cheese that will melt, for example, taleggio – an Italian soft cheese with a crust. It smells strong but is quite mild and has a fruity tang to it. I use taleggio in arancini instead of mozzarella - it's personal taste.

Cut a slice of cheese 2x3 cms and squidge it into a square. This is easy to do provided you do this straight from the fridge – if you leave it lying around it won't work, as fast as you try to cut it it will stick to your knife.

Divide the mixture into 8 round cakes as per the recipe and stuff the middle of the fishcake with the square of cheese, seal and mould, then fridge to chill.

When you're ready to serve pre-heat the oven 180fan/200c/Gas 6. Lightly flour the fishcakes and fry them until they are coloured on both sides. Bake for 10/15 minutes.

The finished fishcake looks like this :


You might even convert the fish sceptics!


Spring Bank Holiday …

is not far away.

So I thought you'd like a lunch/supper suggestion, taken from my most recent class – here's the menu :

Champignon au tartines
The Ivy Fishcakes with Coronation Coleslaw
Hazelnut Hodgepodge

A word of warning – the fishcakes are filling and so I don't think you'll need any additional potatoes. A drizzling sauce would work well. The sauce that is used in The Ivy is Sorrel Sauce and, by chance sorrel is in season from April through to September. Sorrel is a herb that has a sharp lemon flavour – it's the leaves that are used in cooking.

Here's the recipe, courtesy of The Ivy :

Sorrel Sauce

500ml fish stock
50g butter
30g flour
50ml white wine
250ml double cream
15g fresh sorrel, shredded
salt and pepper

You'll need two medium sized saucepans.

Bring the fish stock to the boil in one of the saucepans. In the other melt the butter and stir in the flour. Cook very slowly over a low heat for 30 seconds, then gradually whisk in the fish stock. Pour in the white wine and simmer gently for 30 minutes until the sauce has thickened. Add the cream and reduce the sauce until it is of a thick pouring consistency, then put in the sorrel and season.

A note from me :

The recipe is as written in the book. I would use unsalted butter and plain flour. I'd use a medium dry white wine.

Knorr make a fish stock pot – it's a great product.

You could make larger fishcakes if you're concerned about filling tummies but I don't think you need worry!


Saturday, 13 May 2017

Is there a teenager in the house?

Do any of the following words describe anyone in your household – feel free to tick as many as apply. Gloomy, sullen, sulky, glum, morose, touchy, grouchy, volatile and my personal favourite – cantankerous!

By accident I recently discovered that my “comfort food pasty” may have healing powers. I digress slightly to explain that when I visit my Sister, I take a pasty for her (minus the onion) ready sliced into portions so that they can go straight into her freezer.

Here's an extract from a text she sent :

Apparently your cheese & onion pasties are incredible!

He (my Nephew) was in a foul mood when I got in from work
so I left him to it. I put a pasty in the oven and hey presto
he became human again!

All you have to do now is bottle it! xxx”


So, the method is as follows :

When your teenager arrives home, grunts and passes through to the black hole (aka bedroom) upstairs turn on the oven to pre-heat. Place the pasty in the oven – let the smell of the pasty warming drift to the black hole. The aroma should be enough to get his or her attention. A call of “food is ready” should be sufficient – serve the pasty – preferably on a plate and watch it disappear – may not be a metamorphosis but the demeanour definitely improves.


It's worth a shot!

The proof of the pasty …

is in this step by step photo guide.

Step 1 – soften the onions :


Step 2 – grate the cheese :


If you don't grate ahead have a rummage through the fridge - it's a great way of using up whatever bits and pieces of cheese you've got lurking around – provided they are of the hard varieties and suitable for grating.

Step 3 – cube the potatoes :


Step 4 – combine the ingredients :


Step 5 – place mixture on half of the sheet


Step 6 – cooked pasty


Step 7 – slices of pasty


Whilst 200g of cheese may seem an awful lot 200g divided by eight portions is 25g per serving – as a treat it's not the end of the world.

If you've followed the principles mentioned in The pasty and a triple whammy you'll know that if you've already got the potatoes cooked, the cheese grated and the pastry in the freezer you can assemble this any time you like.

The Defence rests, as they say!

The pasty and a triple whammy!

Those out there who follow the blog will know that it began with a multitasking morning and a cooking and planning for the following week, giving you more time and making life easier. Here are two elements that are always included.

Wrap six large baking potatoes in foil and bake
for an hour and a half then test – remember they will
continue cooking when removed from the oven because
they are insulated by the foil. Cool, then bag and fridge.

Grate a lump of hard cheese of your choice -
Mature Cheddar, Red Leicester, Gruyére, whatever
takes your fancy. Bag or box and fridge.


That's two out of the three – the third is, yet again, a repeat of the perfect product, the puff pastry sheet.

The Pasty

Three large jackets potatoes – cooked and when cool, peel and
cut into a small dice

1 medium onion – finely diced and softened
in a drop of rapeseed oil and a knob of unsalted butter

200g of grated cheese – I'm using Mature Cheddar
Red Leicester and Gruyére

1 tsp of Dijon mustard - optional

Puff pastry sheet removed from fridge to come to
room temperature

1 egg, beaten

Place the potato in a large bowl, add the onion and then the cheese. Unroll the pastry, leaving it on the wrapping sheet of paper. Place the filling on one half of the pastry – it will look as if there's too much filling – there isn't! Pack it tightly – egg wash the edges of the pastry and then fold the remaining half over the filling and “glue” in place. Using a fork, press along the edges of the pasty, egg wash it and then bake in a pre-heated oven 200c/180fan/Gas 6. For 40 minutes – turn after 20 minutes. If you want to freeze the pasty then cook it for 30 minutes – turning after 15 minutes. Freeze and wrap after cooling.

If you choose to freeze think ahead. I would cut the pasty in half and then cut four equal portions from each, giving you eight servings. Freeze the portions to suit – more practical and potentially less wasteful.

Tempted?

Read on ...

Comfort food!

When anyone mentions comfort food I immediately think of chicken soup – this wonderful simple dish - apart from being the ultimate in comfort food - is thought to be a cure-all remedy for many ills.

Everyone has their favourite comfort food - designed to cheer and sustain when you've had a bad time – sometimes you need to cosset yourself. In my book, said food has to be portable i.e. it can sit on a plate without fear of spilling all over the place, and can perch conveniently on top of a cushion placed on your lap - whilst you're catching up on your most recently acquired box set, soap opera or whatever is your viewing passion.

Chicken soup isn't the easiest of dishes to “perch” on a cushion – when I've had a bad time and decide to treat myself I have to be extremely careful – I become clumsy when I'm tired, drop things, bump into furniture - the ultimate is to trip over the rug and pebble dash your living room, so may be soup isn't the best choice – certainly in my case.

My comfort food is a cheese, potato and onion pasty.

I know that there are loads of fantastic bakers out there and these days you can buy a pasty baked in store on the high street - and frozen products too that you can bake in your own oven. This can be risky and can lead to disappointment – the most common fault being a lack of filling - not good when you're in need of comfort. It's important that you can rely on your “food fix”.

What follows may seem odd in that it sounds like I'm anticipating having a bad time and in need of food solace – plan ahead, that's my motto!


Sunday, 7 May 2017

An homage to A A Gill

In December 2016 we lost the food and travel writer, A.A. Gill to cancer. I will always be grateful to him for his outstanding book “The Ivy The Restaurant and its Recipes by AA Gill”.

By way of a tribute to the late Mr. Gill and The Ivy in a class recently I made “The Ivy Fishcakes” – the best recipe for fishcakes I've ever used and put the fishcakes together with the Coronation Coleslaw.

I'm not going to repeat the coleslaw recipe – here are the fishcakes :

The Ivy Fishcakes

(makes 8 – freeze what you don't use)

800g dry mashed potato – no cream or butter added
650g salmon fillet poached in fish stock and flaked
2 tbsp tomato ketchup
2 tsp anchovy essence
3 tsp English mustard
salt and black pepper
plain flour for coating

Mix together the potato, half the salmon, ketchup, anchovy essence, mustard and seasoning until smoother. Fold in the rest of the salmon. Mould the mixture into 8 round cakes and fridge.

When you're ready to serve pre-heat the oven 180fan/200c/Gas 6y. Lightly flour the fishcakes and fry them until they are coloured on both sides. Bake for 10/15 minutes.

I'd like to think that I only recommend kit that I know is worth the dosh and, more to the point, has a useful purpose – in other words it will not find its way to that happy hunting ground for cast aside useless and expensive dusty kitchen stuff in the sky. Say hello to the ricer – you don't have to spend a fortune – price range from £4 to £40 and all points in between.

Here's a photo of mine and one of the fishcake with the slaw too.


P.s. In the book the fishcakes are served with a sorrel sauce but you could serve them with Alfredo sauce or tartare sauce and scale up or down – smaller for a starter and as per the recipe as part of a main course. I should mention that this book is now difficult to get hold of unless you're prepared to pay a King's ransom!


Whilst I'm on the subject …

of tartelettes and croques we might as well carry on with tartines. A tartine is a French open sandwich – especially one with a rich or elaborate topping. My tartine isn't elaborate but it could probably be described as rich.

The following recipe is French and Italian fusion, a tartine drizzled with an Italian sauce – here we have :

Champignon au tartines

Serves 6 as a starter

For the mushrooms

4 tbsp rapeseed oil or similar
500g chestnut mushrooms, sliced
4 cloves of garlic or tsps of paste
salt and black pepper

glug of dry sherry

Heat a large frying pan and add the rapeseed oil. Fry the mushrooms, garlic and salt and pepper on a medium heat and stir. Add a glug of dry sherry and continue frying the mushrooms until they begin to brown. At this point you can set aside until you're ready to serve.

For the sauce

Alfredo

1 tbsp unsalted butter
200ml double cream
50g freshly grated Parmesan
Salt and freshly ground black pepper

Gently heat the butter and cream together, stirring, until the butter has melted then add the Parmesan. Slowly bring to a gentle boil, turn down the heat and simmer, stirring for a minute or so until you have a smooth, creamy sauce.

This element of the dish can be made ahead, cooled, covered and then fridged until you're ready to serve.

For the garnish

2 tbsp flat leaf parsley, finely chopped

When you're ready to serve, warm the mushrooms through, add 2 tablespoons of Alfredo to the mushrooms, mix well.

Toast bread of your choice – I used my faithful friend, soda bread. Add a generous spoonful and garnish with the parsley.

Of course if you want to be really lazy you could decant the mushrooms and sauce into a small bowl – make yourself toasted soldiers and dip!

P.s. Why the sherry? A glug of dry sherry (or red wine if you prefer) enhances the flavour of the mushrooms - either is good.


Here's the sandwich - the “Croque” …

to go with the fried potatoes.

I'm sure you've heard of a Croque Monsieur – it's a baked, or more popularly, fried sandwich which forms a crispy crust but an oozing filling in the middle. Croque literally means “crunch” from the verb “croquer” - “to bite”.

Croque, sandwich, tartine, brushetta, crostini, whatever is your favourite they should all be treated with respect. My personal favourite is a toasted version so, for a decadent treat, here's my latest :

Croque Marianne

for 4 sandwiches

8 slices of medium wholemeal bread
4 tsps Dijon mustard
75g each of Gruyere and mature cheddar cheese, grated
1 medium onion, preferably sweet or mild flavour,
finely sliced and left raw
60g unsalted butter

Spread ½ tsp of mustard over each slice of bread. Spread the cheese onto 4 slices of bread followed by the onions. Sandwich together with the other 4 slices of bread.


Heat half the butter in a frying pan until foaming – you'll get two sandwiches in your frying pan – fry for 1-2 minutes on each side and then pop the croques onto a baking sheet and into the oven whilst you repeat using the remaining butter and two sandwiches.

You may think the onion would be harsh to the palate but I assure you it isn't, provided you use either a sweet or mild variety. The sharpness of the onion cuts through the richness of the cheese.


Serve with your fried potatoes and a salsa or beetroot chutney or even small chunk Branston.

Any leftovers wrap in foil and fridge. Pop into a pre-heated oven 200c/180fan/Gas 6 with your leftover potatoes for 10 minutes. As with the potatoes, some may say even better the next day – I can absolutely confirm you'll still get oozy delicious Croque Marianne!


We all get fed up thinking about food

... in all its forms – the ideas, the lists, the shopping, the cooking, the serving, the moaning – shall I go on!

There's pressure too these days – it has to be this, that and the other – hey all these cookery books look lovely as do many of the recipes – what they don't mention is that if we use every utensil known to man we have to clear up the debris not having the benefit of a fleet of porters to do it for us. I feel so much better for that!

We all deserve a time out – and yah-boo sucks to anyone who thinks differently.

Hands up those who'd agree that there's nothing quite like a well-made sandwich – count me in and, I'm flinching as I type but I'm going to say it, I like mine with chips or fries or whatever you want to call them. I can hear you saying “she has only just been bleating on about utensils and debris – just how much work is this going to involve?!”

Actually, very little.

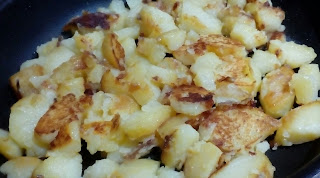
I like my sandwich toasted and I like it with fried potatoes – it's a chip of sorts – and if I'm feeling particularly healthy then even a salad on the side. I like to call it my slob out supper – “SOS” – it's a treat.

My fried potatoes are so easy. For those who've followed my multitasking weeks on the blog you'll know that if my oven is on I will bake jacket potatoes, ready to use as the mood takes.

Here comes the mood!

I used 3 large jackets potatoes and would serve 4 as a generous side.

Peel the cooked jackets – or not if you prefer – cut into a large dice.


Pre-heat a large frying pan (preferably one that can be transferred to the oven). Add a glug of rapeseed oil on a medium heat. Add your potatoes and season with salt and black pepper – leave them to cook and brown slightly for 2 minutes and then turn and repeat. At this stage you can either turn down the heat and turn every two minutes on the hob or transfer to a pre-heated oven whilst you get on with your piece de résistance – your sandwich or croque! On the hob the potatoes will take around 10/12 minutes depending on what sort of colour you prefer.


If you'd prefer to use the oven, then pre-heat 200c/180fan/Gas 6 – check after 10 minutes.

Any leftovers – very funny – wrap and box – they are delicious – some might say even better, hot or cold, the next day.